
I’ve been editing a short documentary recently, and thought it would be fun to share my documentary editing process. This article and the video give an overview of the steps I take to editing a documentary. I don’t care what editing software you use. I use Adobe Premiere Pro. I don’t care what camera you shot your documentary on. We used a Sony F5 and Sony A7S ii. All I want to share with you are the editing steps.
This is just my way of editing. There are other ways to do most the steps. There are different orders to do it. But here is my documentary-editing process:
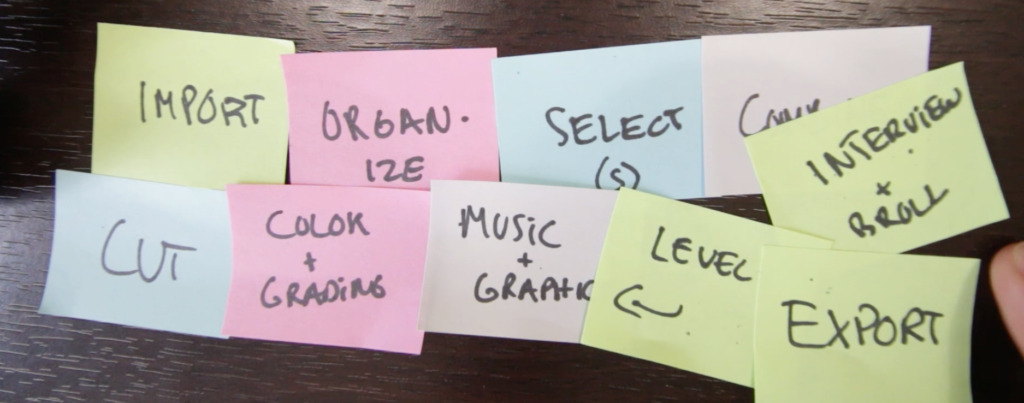
Step 1 – Import
Bring in all of your video footage and audio into your editor. If you have any photos, graphics, or music, bring those in too.
Step 2 – Organize
This is a very important step, especially for bigger projects. I create folders for audio, video, graphics, sequences, music, photos, and any other major category of assets. All of the clips go in their respective bin. In the video folder, I create sub-folders for different scenes or interviews that we shot .
Step 3 – Select
Create sequences for each scene and pull your favorite clips onto that timeline. For your interview, create a synced sequence with all cameras and audio synced. Then start cutting it down to the best clips, duplicating the previously-created sequence with each round of cuts.
Step 4 – Combine
When you have your best interview soundbites in one sequence and broll sequences with all of your best shots, create a new sequence and start combining everything. This is really where you start to get creative. Match broll to what the interviewee is saying. Move soundbites around to create a great story. Add photos or other broll assets if you have them. I’ll sometimes add temporary music during this step to get an overall ‘vibe’ of the documentary while editing.
Step 5 – Cut
Once you have all of your interviews editing with broll and temporary music, start chopping it up. Create a new sequence every time you open up your project, in case you want to go back to yesterday’s cut for reference or to undo. The cutting process can take many many rounds. I encourage you to show your cut to others to get their opinion before finalizing.
Step 6 – Color
After the picture is locked (i.e. the interviews and broll footage are in place), it’s time to color correct and grade your footage. Color correction is making sure your footage looks natural. Color grading is giving your video a stylistic look. I use Adobe’s Lumetri Color to do color correction and grading.
Step 7 – Add Final Music & Graphics
After you color, it’s time to add music and graphics. If you are having an original score done for your documentary, you’ll want the picture locked so that they can create the score based off your cuts. Note: If you aren’t having an original score done, it might be better to add music during the cut step so that you can cut your video to the music. Step 7 is also when you add final graphics. I like adding graphics after color correction because the color of titles and other overlay graphics might change depending on the color correction and grading.
Step 8 – Perfect
Now you have everything together. Make sure your audio is leveled properly for both music and interviews/voice over. Double check that your color looks great.
Step 9 – Export
Once everything is as perfect as can be, it’s time to export. How you export depends on how you will be distributing your documentary. If you are just showing it online, I usually export a high quality h264 file. For showing at film festivals and other screenings, you might have to export differently. Talk to the festival to find out what their specs are.
That’s basically it! It’s not too bad, right?
Do you have any questions? Let me know in the comments below.
If you’re interested in learning how to edit, enroll in my Adobe Premiere Pro course. I also have a course on creating graphics with Adobe After Effects.
Cheers,
Phil
Leave A Comment
You must be logged in to post a comment.